Fantastic! I finally caught my very first queen ant! I can’t wait to have my first ant colony! I’m so excited!
Wait, and now? What should I do next?
If you feel that this hypothetical conversation accurately reflects your current situation, you’ve found the right guide! Let’s see what you should do after catching your very first queen ant!
In this short guide you’re going to learn what steps you need to take after catching your very first queen ant! Where to put her, what to feed her, and everything you need to know to lay the foundation for a healthy and prosperous ant colony!
Let’s get into it!
Introduction
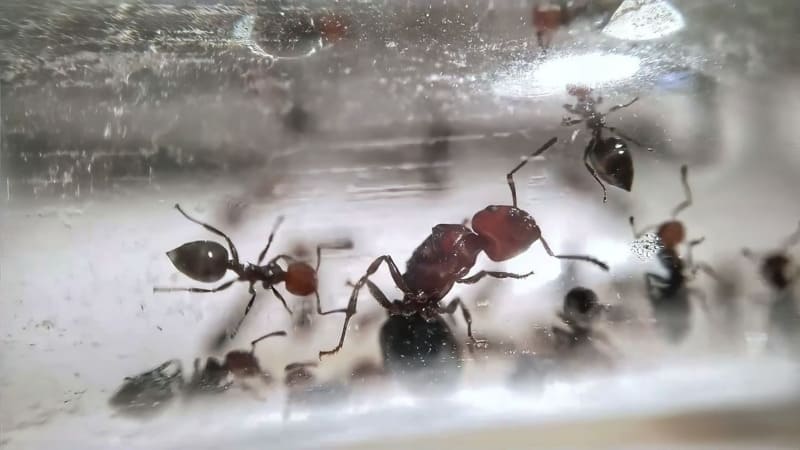
Catching your very first queen ant can be an amazing and fulfilling experience for an ant keeper, especially if you are new to this fantastic hobby! Watching the queen care for the next generation of workers is an extremely relaxing and enjoyable pass time, and makes you really appreciate how cool and smart these tiny animals can be!
But what should you do after catching your very first queen ant? Let’s start with the first step!
If you haven’t already had the opportunity of catching your first queen ant, you can jump right to this guide! In this article you will find all the pieces of information needed to get your hands on your very first newly mated queen ant!
Where Should I Put Her?
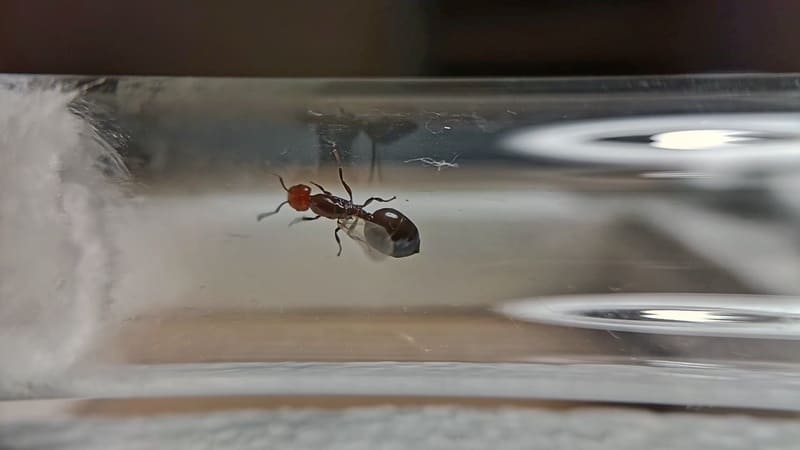
Ok, you just caught your first queen ant, and now she’s probably sitting inside some sort of small plastic container like the one below. These types of containers are not very good for housing a small ant colony in its funding stage, and can actually create more harm than good.
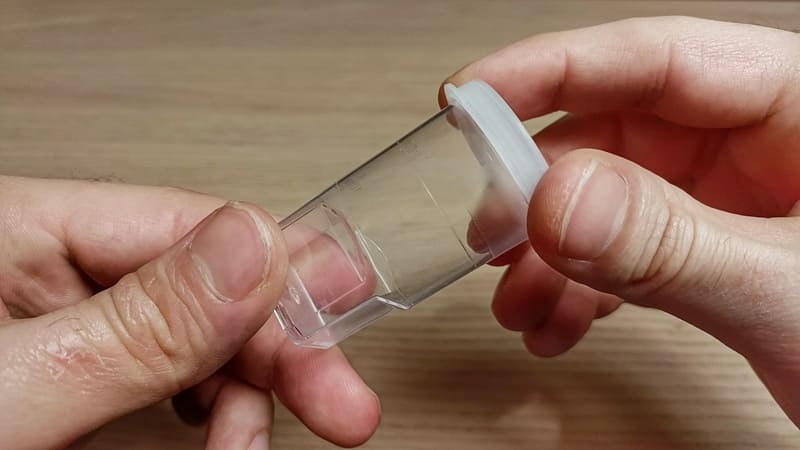
They lack the right amount of humidity, and they don’t have a proper water source. They are also very difficult to maintain, as the living space of the colony is extremely limited. For these important reasons, we need to create a better funding nest alternative, one which has a water source, some moisture, and it’s easy to maintain.
In this situation, the so-called test tube setup comes to our rescue!
This particular type of setup is considered by most ant keepers to be the gold standard of founding nests. The test tube setup is undoubtedly the best way to recreate the environment that a young colony experiences in the wild, as it accurately replicates the same amount of space, humidity, and temperature.
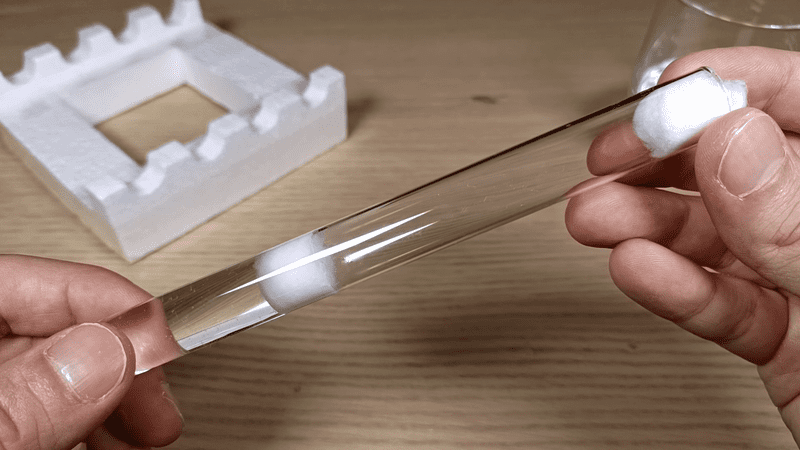
To build this effective type of funding nest, you don’t need lots of items. The most important element of a test tube setup is, as the name suggests, a test tube. For this setup, the material of the test tube doesn’t matter very much, and you can choose between glass and plastic as you please.
Apart from the test tube, you’re gonna also need some cotton, water, and some sort of long stick.
If you’re reading this guide, there’s a very high chance that you are just starting out with this hobby, and that you don’t have any idea on how to make this kind of nest setup. But you don’t need to worry about that!
I made a detailed step-by-step guide on how to make the perfect test tube setup! You can find it here! In the short guide, I explain in detail everything you need to know to successfully prepare a test tube setup, starting from the basics, all the way to the final result!
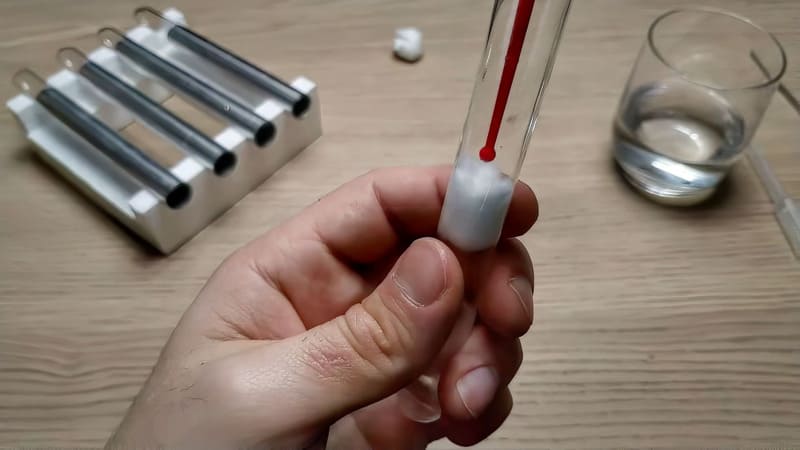
Now that we have our test tube setup, it’s time to give the queen a new home!
To do that, just remove the cotton ball to open the setup, and gently make your queen find the path to the test tube. Try to make this as safe as possible, as we definitely don’t want to harm the queen in the process!
When the queen is in, close the test tube with the cotton ball.
Fantastic! Now our queen has a proper home, in which she can start to lay eggs and raise her own colony!
In the next step, we’re going to answer another frequently asked question regarding this important funding stage! Let’s continue!
Should I Feed The Queen?
To answer this important question, we first need to understand the difference between fully claustral and semi-claustral queens.
A fully claustral ant is a type of queen ant that is able to start a new colony without needing to forage for food. That’s because this particular type of queen is able to use the nutrients she already has in her body to feed herself and her first few generations of offspring.
This useful characteristic allows the queen to establish a new colony in a location where food is not readily available, increasing the chance of surviving the funding period.
On the other hand, a semi-claustral queen is a type of queen ant that doesn’t have this ability, and needs to forage for food even during her funding stage.
Now that we know the differences between these two types of funding options, we need to check whether our queen is fully claustral or not. To do that, we have to find out which species of ant our queen belongs to.
If you don’t know it yet, you can ask a question in one of the many online forums dedicated to ant keeping, sending them some pictures of your newly caught queen. When you have the name of the species, check online whether she’s a fully claustral species or not.
As a general rule, you can check the gaster of the queen. If it’s large and voluminous compared to the rest of her body, she’s likely fully claustral. On the other hand, if the gaster is small and thin, she’s probably semi-claustral, and needs to be fed during the funding stage.
However, even if the queen you just caught is fully-claustral, I would suggest you give them a little drop of honey. This little sugar boost will help the queen stay energized during the long funding period, and will also help her first workers during their first days!
Here you can find my review of one of the best ways to provide your newly caught queen ant with a healthy source of sugar: the Ant Antics sugar snaps!
Conclusions
Now we can put the test tube setup and our little queen ant in a safe and quiet place, giving her the time to lay her first batch of eggs and start her own ant colony!
Starting an ant colony from a single queen can be a fun and educational experience, and can provide a unique and fascinating glimpse into the world of these fascinating creatures!
If you are new to the amazing hobby of ant keeping, you should definitely check out this tutorial! In this one, I explain in detail how to start ant keeping with as little as $1! That’s a steal!

Real-world impact!
Thanks to the BRUMA Ants Plus subscribers and our partner Ecologi we are planting lots of trees all around the world! Click on the Ecologi logo to see the real-world impact of this amazing community!
Join our Discord!